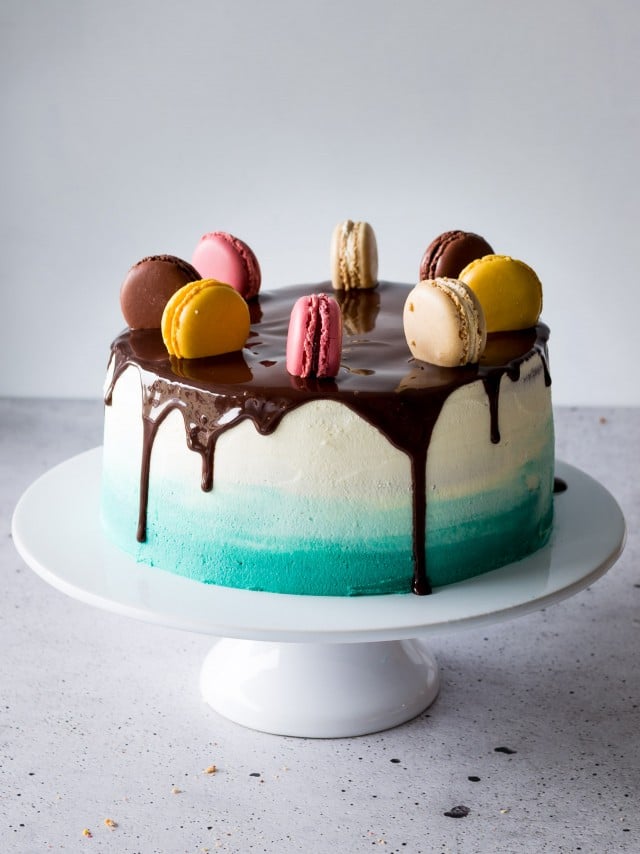
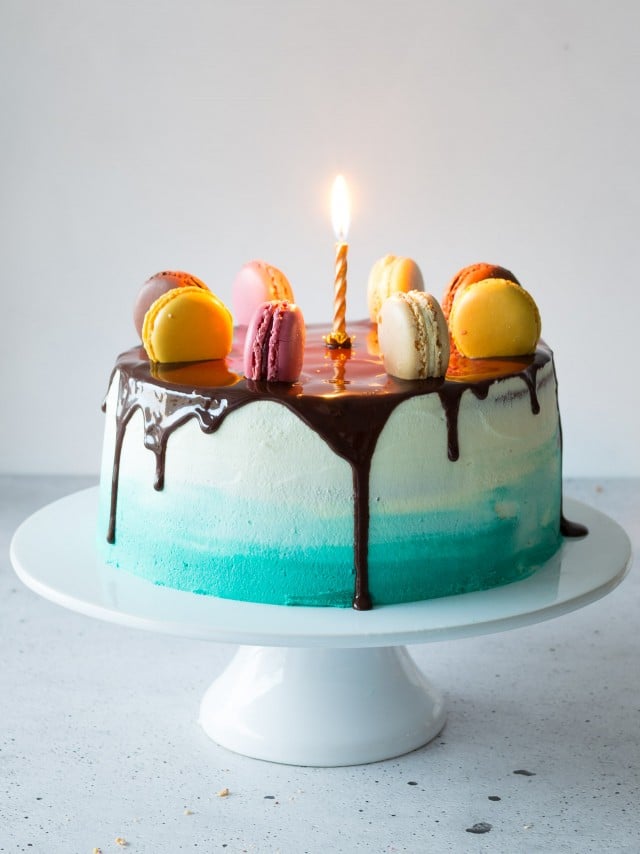
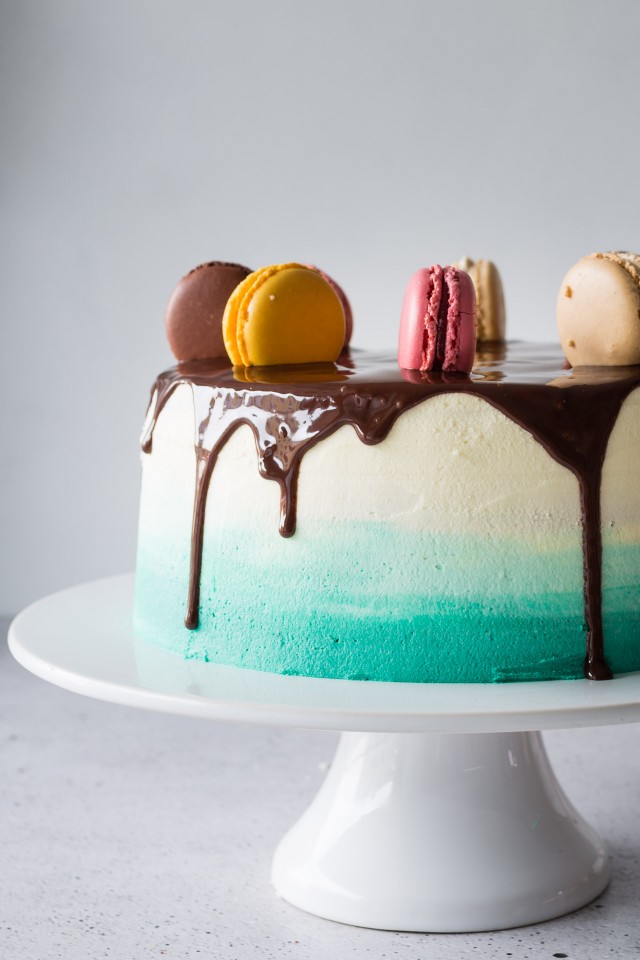
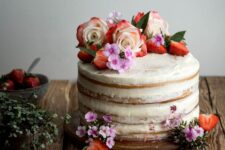
Treat your sweet tooth with this Vanilla Ombre Cake. This visually stunning dessert features moist vanilla layers in a gradient of pastel hues, elegantly frosted with rich chocolate ganache. Perfect for any celebration or indulgent moment.
I really can’t believe it’s been a year already. Partly because it’s gone so quickly, but also because it feels like it’s been so much longer.
I’m not going to get all cliche and soppy in this post, because I’m sure you’ve all read a million blog posts like that.
Just trust me that I’m overwhelmingly excited about today’s post.
The biggest change this anniversary is bringing is the blog redesign.
And the change is a major one. I’ve gone from my little prebuilt WordPress theme to a completely custom-built theme that myself and my husband designed and coded ourselves.
I can’t even begin to explain the amount of hours that have gone into this, but I am so over the moon happy with it, that I don’t really care.
It was very important to us to build this new design ourselves because we had such a strong vision of what we wanted it to be.
This will be a place where you can easily access a whole library of easy, vegetarian recipes that you can make whatever your skill level is.
The focus of this site is the food, so we wanted everything to be visual.
After all, we eat with our eyes too.
Most importantly, I want to thank you.
Your support over the last year has been overwhelming.
It’s something I never expected, but I have truly met some of the most incredible people this year and forged some wonderful friendships.
I hope to be able to connect with even more of you this year!
So in 2016, you can expect more regular recipes, focused around creating easy, achievable vegetarian meals.
We’ll be adding to our video library regularly, growing our current collection, and bringing you even more great content.
My subscribers can also expect a weekly email full of fresh new recipes, so if you want to get that, make sure you are subscribed by clicking below!
Vanilla Ombre Cake with Chocolate Ganache
Recipe adapted slightly from Renee Kemps
Equipment – 2 x 9 inch round cake pan
Ingredients
For the Vanilla cake
375g Butter, room temperature
500g Caster sugar
5 Eggs
2 teaspoons vanilla extract
374g all purpose flour
2 teaspoons baking powder
¼ teaspoon salt
Zest of 1 Orange
125ml milk
125ml sour cream
Vanilla Buttercream
250g butter, room temperature
500g icing sugar
2 teaspoons vanilla extract
For the ganache
130g dark chocolate chunks
125ml cream
1 tablespoon butter
For topping
8 Macarons (optional)
If you would like to make your own macarons, I have a detailed technique guide, a Chocolate Coffee Macarons recipe, and an Earl Grey Tea Macarons recipe.
Instructions
For the cake
1. Preheat oven to 165 C.
2. Combine the flour, baking powder and salt and mix until evenly distributed.
3. Beat the butter and sugar together in a stand mixer until pale and fluffy (around 8 minutes).
4. Add the eggs to the butter and sugar mixture, beating thoroughly between each addition.
5. Add the flour in 3 parts, alternating with the milk and sour cream. Mix on a low speed in between. Add the orange zest at the end and mix just until everything is smooth and combined. Do not overmix.
6. Grease and line the two 9 inch cake pans and divide the mixture evenly between the two. Bake for 90-100 minutes or until a toothpick inserted into the middle of the cake comes out clean. Transfer to a cooling rack to cool completely
For the buttercream frosting
Full guide on How To Make the Perfect Buttercream Frosting
1. Beat the butter on a high speed in the stand mixer for 8 minutes until pale and fluffy.
2. Gradually add the icing sugar and mix slowly until fully combined. Once all the sugar is combined, add the vanilla and beat on a high speed for a further 10 minutes.
For the ganache
1. Break the chocolate into small chunks in a heatproof bowl
2. Heat the cream in a saucepan until it just starts to simmer.
3. Pour the cream over the chocolate chunks and stir until the chocolate is completely melted and smooth. Add the butter and stir.
4. Set aside until ready to assemble the cake.
Assembly
1. Trim the cakes so they are flat along the top. Ice one of the cakes completely then place the other on top and ice. Scrape off the excess icing to give a “crumb coat”. Place in the fridge for 15 minutes.
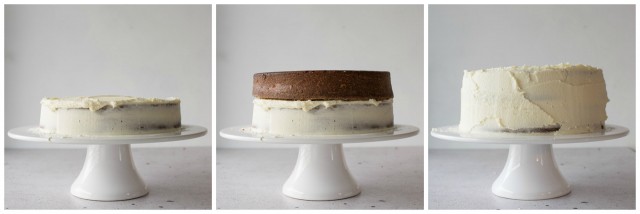
2. Remove the crumb coated cake from the fridge. Divide your remaining icing into 3 parts in the ratio 3:1:1. Leave the largest part white. Color 1 of the small parts a pale shade of any color you like using food coloring. Then color the other small part a dark shade of the same color. Put the white icing on top of the cake and around the sides on the top half. Add the pale color to the middle of the sides of the cake and the darkest color around the rim of the bottom of the cake. Use a pallet knife to blend the icing slightly at the joins.
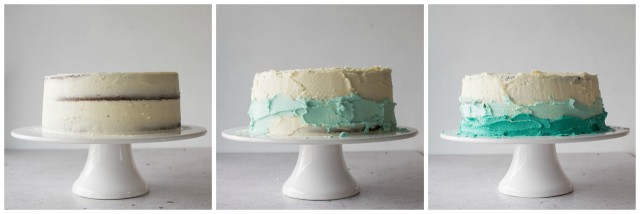
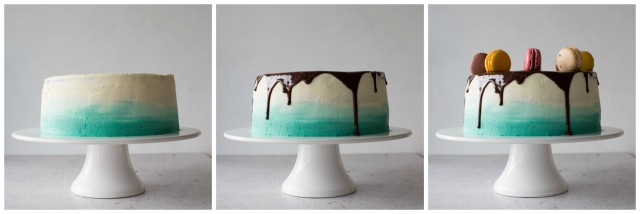
3. Using a large flat scraper or a pallet knife, go all the way around the cake to smooth the icing out. This will help blend the final layers together and create a smooth finish. Place in the fridge for another 15 minutes. Pour the chocolate ganache on top of the cake until it just reaches the edges and then let it drip over the edge slightly. If desired, top with macarons or other cookies for decoration.
Vanilla Ombre Cake With Chocolate Ganache
Ingredients
For the Vanilla cake
- 13.2 oz butter room temperature
- 17.6 oz caster sugar
- 5 eggs
- 2 tsps vanilla extract
- 13.1 oz flour all purpose
- 2 tsps baking powder
- ¼ tsps salt
- 1 orange zest
- 125 ml milk
- 125 ml sour cream
Vanilla Buttercream
- 9.1 oz butter room temperature
- 17.6 oz icing sugar
- 2 tsps vanilla extract
For the Ganache
- 4.5 oz dark chocolate chunks
- 125 ml cream
- 1 tbsp butter
Toppings
- 8 macarons optional
Instructions
For the Cake
- Preheat oven to 329°F (165°C)
- Combine the flour, baking powder and salt and mix until evenly distributed.
- Beat the butter and sugar together in a stand mixer until pale and fluffy (around 8 minutes).
- Add the eggs to the butter and sugar mixture, beating thoroughly between each addition.
- Add the flour in 3 parts, alternating with the milk and sour cream. Mix on a low speed inbetween. Add the orange zest at the end and mix just until everything is smooth and combined. Do not overmix.
- Grease and line the two 9 inch cake pans and divide the mixture evenly between the two. Bake for 90-100 minutes or until a toothpick inserted into the middle of it, the cake comes out clean. Transfer to a cooling rack to cool completely.
For the Buttercream Frosting
- Beat the butter on a high speed in the stand mixer for 8 minutes until pale and fluffy.
- Gradually add the icing sugar and mix slowly until fully combined. Once all the sugar is combined, add the vanilla and beat on a high speed for a further 10 minutes.
For the Ganache
- Break the chocolate into small chunks in a heatproof bowl
- Heat the cream in a saucepan until it just starts to simmer.
- Pour the cream over the chocolate chunks and stir until chocolate is completely melted and smooth. Add the butter and stir.
- Set aside until ready to assemble the cake.
Assembly
- Trim the cakes so they are flat along the top. Ice one of the cakes completely then place the other on top and ice. Scrape off the excess icing to give a “crumb coat”. Place in the fridge for 15 minutes.
- Remove the crumb coated cake from the fridge. Divide your remaining icing into 3 parts in the ratio 3:1:1. Leave the largest part white. Color 1 of the small parts a pale shade of any color you like using food coloring. Then color the other small part a dark shade of the same color. Put the white icing on top of the cake and around the sides on the top half. Add the pale color to the middle of the sides of the cake and the darkest color around the rim of the bottom of the cake. Use a pallet knife to blend the icing slightly at the joins.
- Using a large flat scraper or a pallet knife, go all the way around the cake to smooth the icing out. This will help blend the final layers together and create a smooth finish. Place in the fridge for another 15 minutes. Pour the chocolate ganache on top of the cake until it just reaches the edges and then let it drip over the edge slightly. If desired, top with macarons or other cookies for decoration.


The ombré colour on this cake is absolutely stunning. Congratulations on your first blog birthday and I am completely in awe of your ability to design your own website. I hope you have many more years of brilliant blogging, baking and recipe making. Sammie x
Thank you for such a lovely comment Sammie <3 It was a lot of fun to design!!
Your new design and look is beautiful, the cake is beautiful, it’s all beautiful! Looking forward to seeing what comes next (:
Thanks Katie! It was a really fun cake to make!
What a gorgeous cake! This looks perfect to celebrate a blogoversary. Or anything, really. Love the ombre effect :)
Thanks June! It was a super fun one to make!
Oh Lauren, the new look is AMAZING! Well done to you both, such an achievement! The cake looks incredible, too. I love the ombre too. I’ve never tried that buttercream technique before, but i’ll defiantly be giving it a go.
Looking forward to seeing everything the coming year brings :)
Jennie xx
Thanks Jennie that’s so kind! The cake was super fun to make! I’d never done an Ombre cake either! I think I might do a tutorial on it some time!
Congratulations. Beautiful stuff xx
Thank you Amy!
Happy blog birthday, the blog looks amazing you would never think you had only been doing this a year and that cake is epic. x
Thanks so much Rebecca that’s a massive compliment! I definitely have a lot to learn and look forward to the journey! Thank you for the comment :)
Looks Fab! The photos are great. Can’t wait to try the recipes! Xxx
Thanks Mummy Sue! xx
The blog is absolutely gorgeous. What a perfect recipe to feature on your birthday, too. A cake! I love the ombre effect as well. I think it is ultra cool that you coded and designed this whole thing. Are you your own server, too? Congratulations!
Thanks Terri! It was super fun to make a cake. I started my whole foodie live with cakes so it felt fitting :)
I’m not my own server, currently with SiteGround!