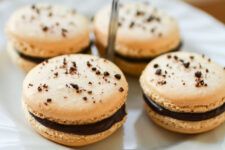
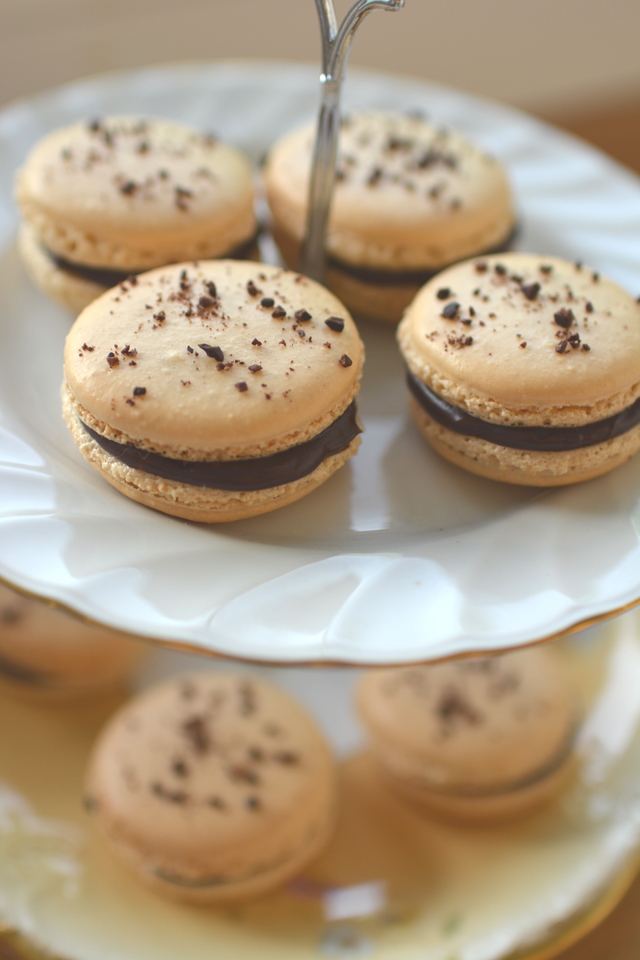
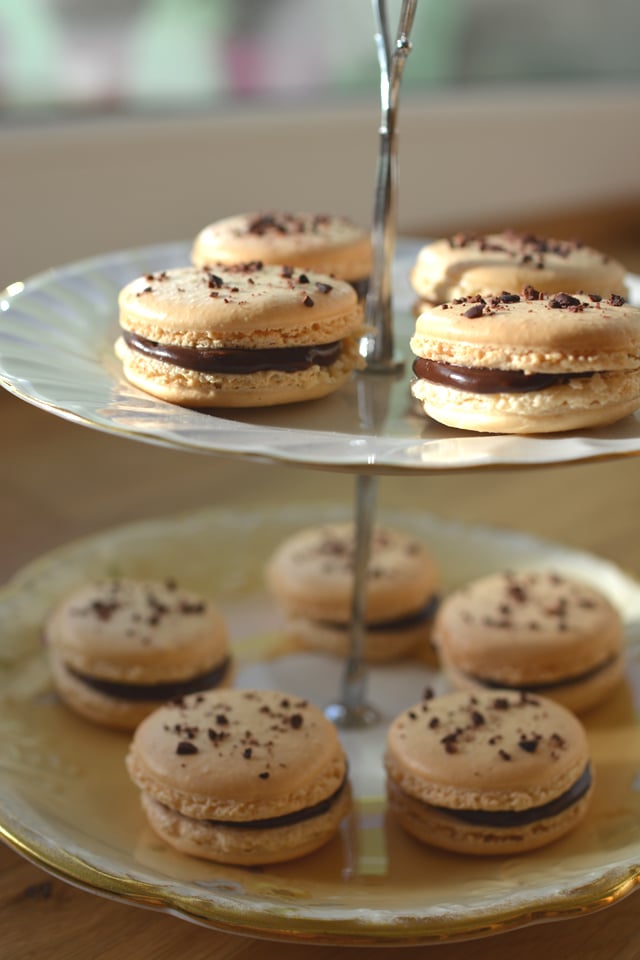
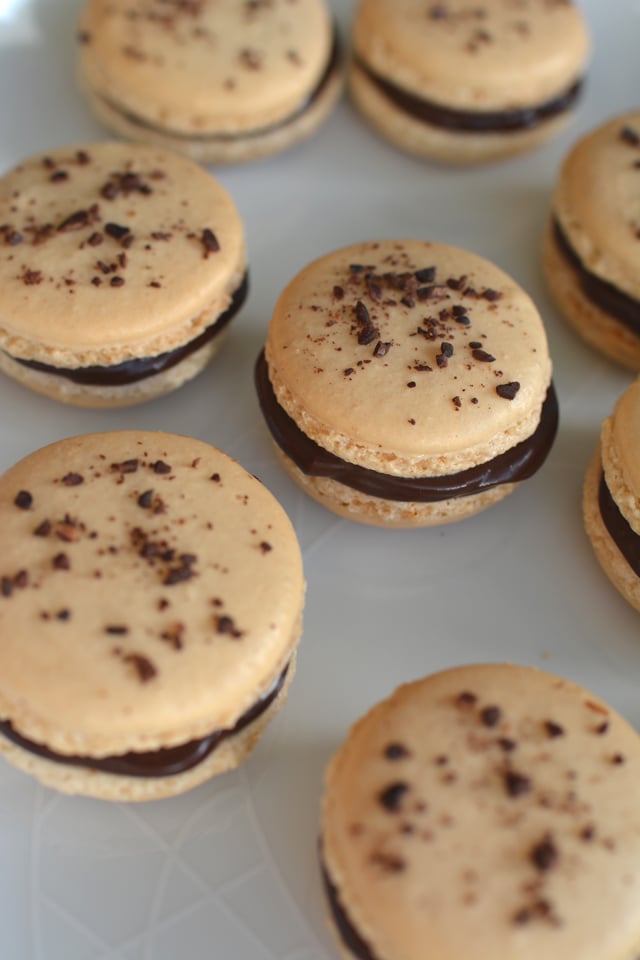
These chocolate coffee macarons are inspired by the best combination of espresso coffee and chocolate. Each macaron is sprinkled with crushed cacao nibs and filled with an espresso coffee and dark chocolate filling.
I’m a big fan of macarons (The French sandwich cookie kind, not a coconut macaroon, although I’m a big fan of those too!). They are the ultimate “fancy” cookie, and yet they carry such a bad rep for being almost impossible to make.
Macarons have a reputation for being impossible to make. I believe the key is being prepared and not being scared of the batter. There are only a few ingredients needed and they can all be found in your local grocery store.
I’ll admit they are temperamental, however, if you set out knowing what to expect and what to look for at each stage, you should have success with these little almond delights.
Before you start, if you haven’t made these before, please read my macaron how to post, which should tell you everything you need to know about each stage of making a macaron.
These macarons are chocolate coffee flavored. The coffee flavor isn’t overwhelming, just enough to enhance the flavor of the chocolate and impart a touch of bitter espresso-ness. Yum!
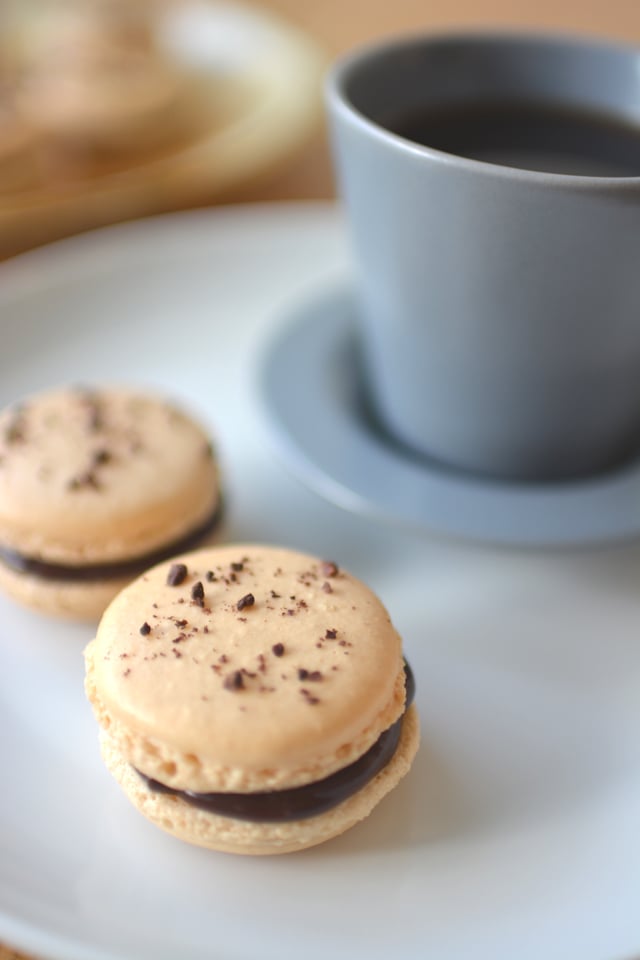
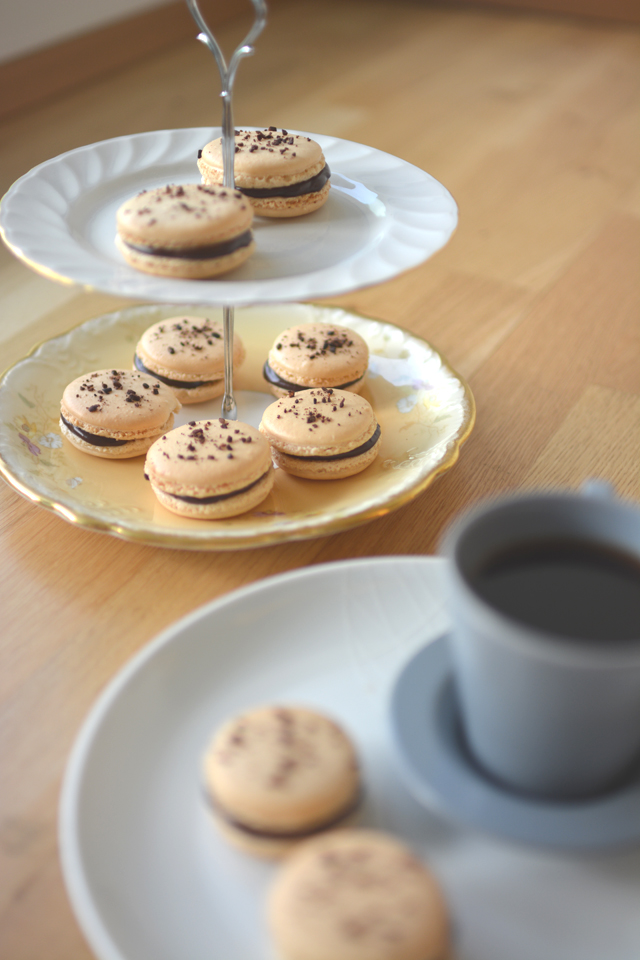
I’ll make an exception to my usual cup-of-tea-with-cake rule for these because they should really be enjoyed alongside a nice coffee.
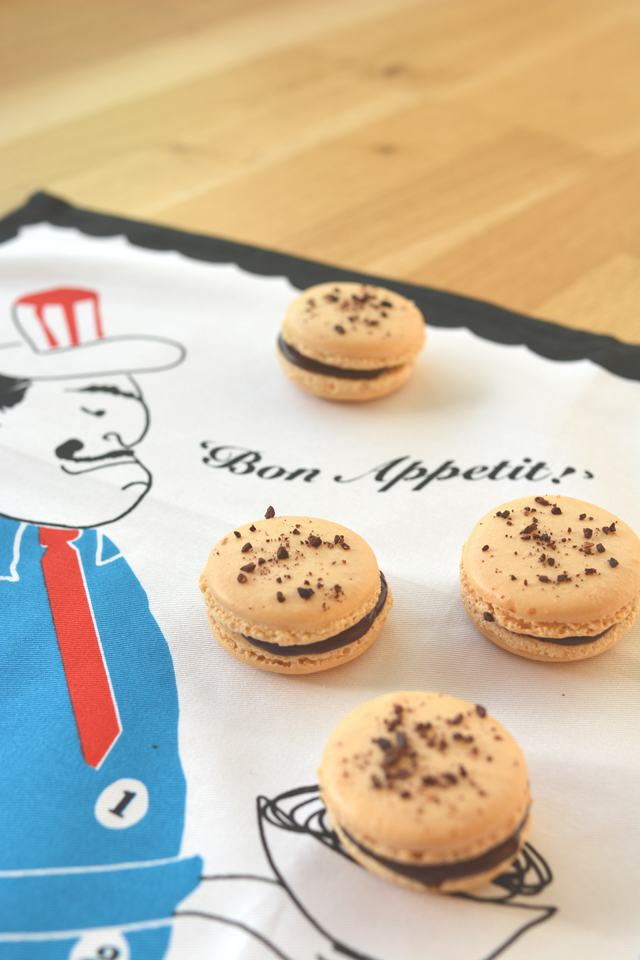
So whip up a bunch of these and transport yourself to a Parisian promenade with a soft accordion playing in the background and the Eiffel Tour just in sight in the distance… or you know… your sofa.
Why You’ll Love This Recipe
- Unique Flavor. These macarons are not like most macarons. They have a wonderful espresso and chocolate flavor.
- Not Too Sweet. The filling and macarons have the perfect amount of sweetness.

How to Make Chocolate Coffee Macarons
Take a bite out of these macarons and be transported to France. The recipe is easier than you think.
Key Ingredients
- Confectioners’ Sugar. Macarons require super fine sugar and confectioners’ sugar is perfect for this recipe.
- Almond Flour. This is the only flour you need to make macarons.
- Caster Sugar. This is finely ground regular sugar which helps keep these macarons light.
- Egg Whites. The egg whites are used to create a meringue. Always use fresh egg whites from eggs instead of a carton.
- Cacao Nibs. These cacao nibs add a chocolate flavor without the sweetness.
- Double Heavy Cream. Makes a perfectly thick creamy chocolate filling.
- Dark Chocolate. Compliments the bitter espresso flavor.
- Espresso. Gives these macarons a deep coffee flavor.
Step-by-Step Instructions
1. Remove any Lumps. Thoroughly sieve the almond flour and confectioners’ sugar into a large bowl. Make sure all the dry ingredients are evenly distributed.
2. Separate the Yolks and Egg Whites. In another large bowl, separate the egg whites and yolks.
3. Whisk the Egg Whites. Using a stand mixer, whisk the egg whites until they are bubbly and frothy. Add the caster sugar, a little bit at a time, and mix after each incorporation. Once all the sugar is incorporated, whisk the egg whites until you have soft peaks.
4. Add Food Coloring. Add any food coloring you want to add. I prefer gel colors since they are a bit more intense. Keep whisking the egg whites until you have stiff peaks.
5. Mix the Egg Whites and Almond Flour. Add the egg whites to the bowl with the almond flour and fold in gently using a spatula. Keep folding until the batter has a soft consistency, drops off the spatula, and sinks back into the batter in the bowl.
6. Add Batter to a Piping Bag. Place the batter in a piping bag with a round nozzle attached. Line a baking tray with parchment paper and pipe even circles onto the paper.
7. Leave the Unbaked Macarons to Dry. Leave them in a cool dry place for a few minutes. Sprinkle half of the circles with the cacao nibs and leave for about half an hour to dry.
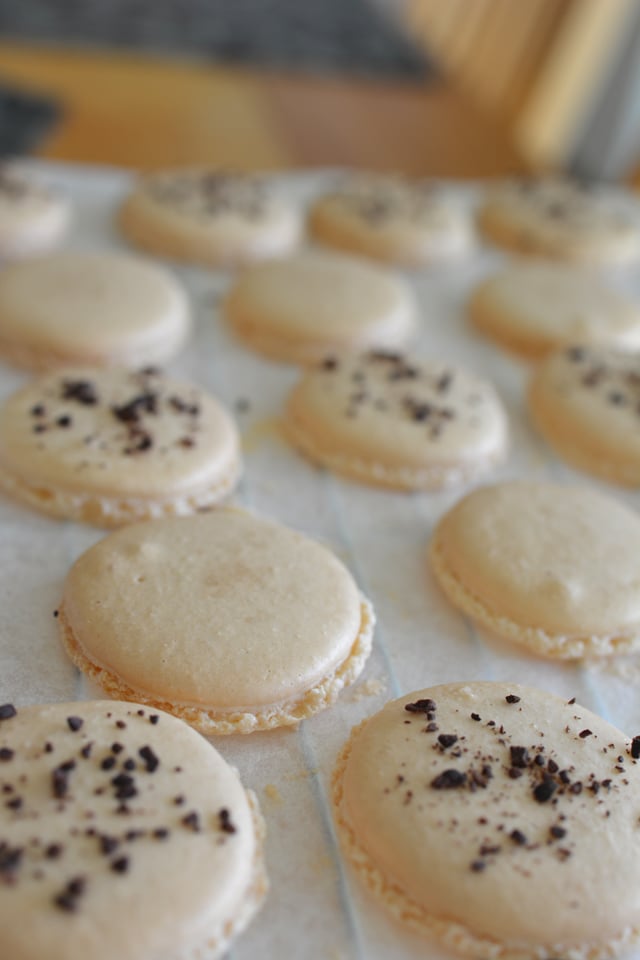
8. Bake the Macarons. While the shells are drying, preheat the oven. After they are dry, bake them. Allow the baked macarons to cool on a cooling rack until the shells easily peel away from the paper.
9. Make the Filling. While the shells are cooling, chop the chocolate into small chunks and place them in a heat-proof bowl. Brew the espresso coffee. Heat the cream on low to medium heat in a saucepan stirring constantly. Pour over the chocolate, add the coffee, and let sit for a couple of minutes. After a couple of minutes stir to fully combine the chocolate and cream. Allow the filling to completely cool before piping.
10. Pipe the Filling into the Macarons. Spoon some chocolate mixture into a piping bag and cut off the end to make a small opening. Pipe onto half of the shells with no cacao nibs on top, then sandwich with the chocolate-covered shells.
Recipe Tips, Variations, and Substitutions
- Store macarons in the fridge to develop texture. Before serving the macarons you can store them in an airtight container in the fridge overnight to develop a chewy center.
- Double heavy cream can be substituted with whipping cream. Double heavy cream is extremely high in fat and is used in Europe. If you require a substitute try using whipping cream.
Storage Recommendations
Macarons can be stored in an airtight container at room temperature for up to 7 days. You can also store them in the fridge for up to 7 weeks. You can also store the macarons in the freezer for up to 3 months. Simply take them out of the freezer about an hour before you want to eat them and let them come to room temperature.
Try These Other Cookie Recipes
- Stamped Marzipan Layer Cookies – They are a combination of marzipan and shortbread, with a customized stamp.
- Grain-Free Thumbprint Cookies – These cookies are made with almond flour and coconut flour and use fruit jams. They’re a simple cookie that is perfect for any time of the year.
- Gluten-Free Chocolate Chip Cookies – These chocolate chip cookies will remind you of bakery-style chocolate chip cookies with their chunky chocolate chips and a sprinkle of salt.

Chocolate Coffee Macarons
Equipment
- 1 piping bag with round attachment
- 1 sifter
- 1 saucepan
Ingredients
For the Macaron Cookies
- 1/2 cup confectioners' sugar
- 7 tbsp. almond flour
- 3 tbsp. caster sugar
- 2 eggs whites
- 1 tsp. cacao nibs slightly crushed
For the Chocolate Coffee Filling
- 150 ml double heavy cream
- 3/4 cup dark chocolate preferably 70% cocoa solids
- 3 tsp. espresso freshly brewed
Instructions
Please read my “How To – French Macarons” post before starting for detailed instructions on what to expect at each stage of the process.
- Thoroughly sieve the almond flour and confectioners' sugar into a large bowl. Ensure that no big lumps remain as these will stop the tops of the macarons being smooth. You can blitz the almond flour in a food processor briefly on a pulse setting to grind further, however don’t blend for too long or the oil in the almonds will cause you to end up with almond butter. Make sure all the dry ingredients are evenly distributed.
- In another large bowl separate the egg whites and yolks, for this recipe you only need the whites. It is vital that no trace of yolk ends up in the bowl, and that the bowl itself is free from any grease.
- Using a stand mixer, whisk the egg whites until they are bubbly and frothy. At this point add the caster sugar 1 tbsp at a time and mix after each incorporation. Once all the sugar is incorporated, whisk the egg whites until you have soft peaks which don’t hold their own weight. At this point, add any food coloring you want to add. I normally use gel colors as they are a bit more intense. With macarons, the color you make the raw batter is likely to be 1-2 shades darker than how they will look when cooked, so you want to make your batter a little darker than the final color you would like. For these macarons I used an ivory color, but use whatever color you like!
- Once the color is added, keep whisking the egg whites until you have stiff peaks. This will be when you pull the whisk up through the egg white and the “peak” it forms, stays straight up with it’s own weight. At this point they are done!
- Add the egg whites to the bowl with the almond flour and fold in gently using a spatula. Regularly scrape down the bowl. Keep folding until the batter has a soft consistency and drops off the spatula, and just sinks back into the batter in the bowl.
- Place the batter in a piping bag with a round nozzle attached. Line a baking tray with parchment paper and pipe even circles onto the paper. If you would like a guide, you can download and print off my Macaron Template. Place it underneath the parchment paper and remove before putting in the oven.
- Once the circles are all piped, leave them in a cool dry place for 5 minutes. Sprinkle half of the circles with the cacao nibs. Leave for a further 35 minutes to dry. They are ready when you can gently poke the side and it feels dry and gently springs back. (Don’t push it too hard though!)
- While the shells are drying, preheat the oven to 302⁰F (150⁰C). After they are dry, bake for 15-16 minutes. Allow to cool on a cooling rack for a few minutes until the shells easily peel away from the paper. Allow to cool completely.
- While the shells are cooling, chop the chocolate into small chunks, if you are not using chocolate chips, and place them in a heat-proof bowl. Brew the espresso coffee. Heat the cream on low to medium heat in a saucepan stirring constantly. Don’t let the cream boil, when it is steaming and has small bubbles forming at the edges it is ready. Pour over the chocolate, add the coffee, and let sit for a couple of minutes. After a couple of minutes stir to fully combine the chocolate and cream. You will be left with a runny glossy mixture. This needs filling needs to cool for a couple of hours before it will be thick enough to pipe into the shells.
- Spoon some chocolate mixture into a piping bag and cut off the end to make a small opening. Pipe onto the half of the shells with no cacao nibs on top, then sandwich with the chocolate covered shells.
- Ideally, put the macarons into an airtight container and keep in the fridge overnight. This allows the shells to absorb some of the moisture from the ganache, and get a nice chewy centre.