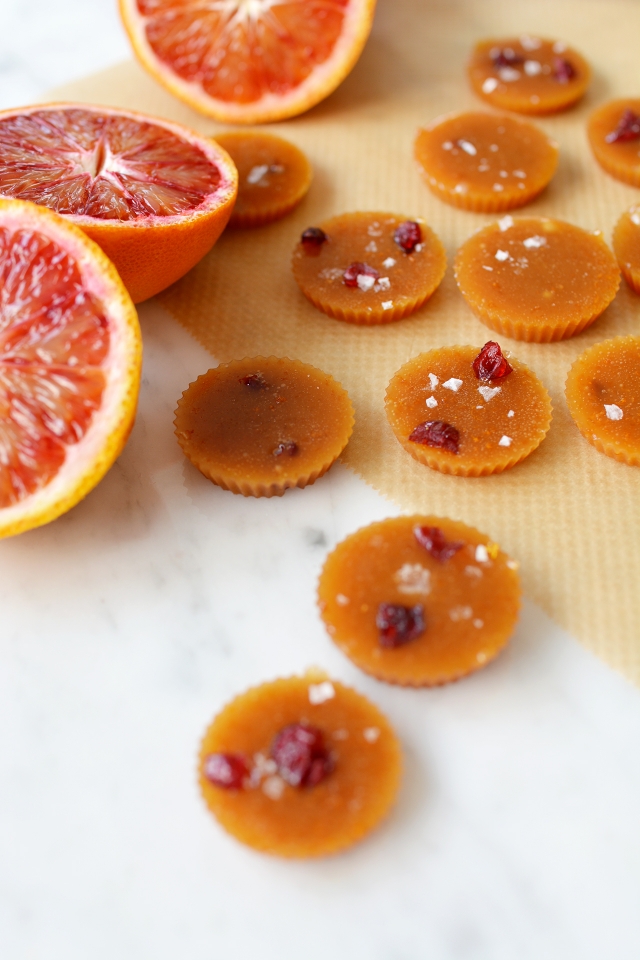
Treat your sweet tooth with these salted blood orange toffees. These chewy delights blend zesty blood orange with a hint of sea salt for a unique and delightful treat. Get ready to savor a citrusy twist on classic toffees!
Making caramel is not something to be feared; in fact, one of the most important instructions is not to stir it. These are the kind of toffees your grandma would always have in her handbag (think Werther’s Originals) except they are elevated with sea salt and awesome orange-ness, which obviously takes them to another level!
Using a mix of water and blood orange juice, gives the toffees a hint of flavor from the juice, but also that signature buttery toffee taste. The addition of the orange zest is what gives the most kick of orange flavor. When the zest first hits the hot toffee in the pan… oof that is an orange hit!
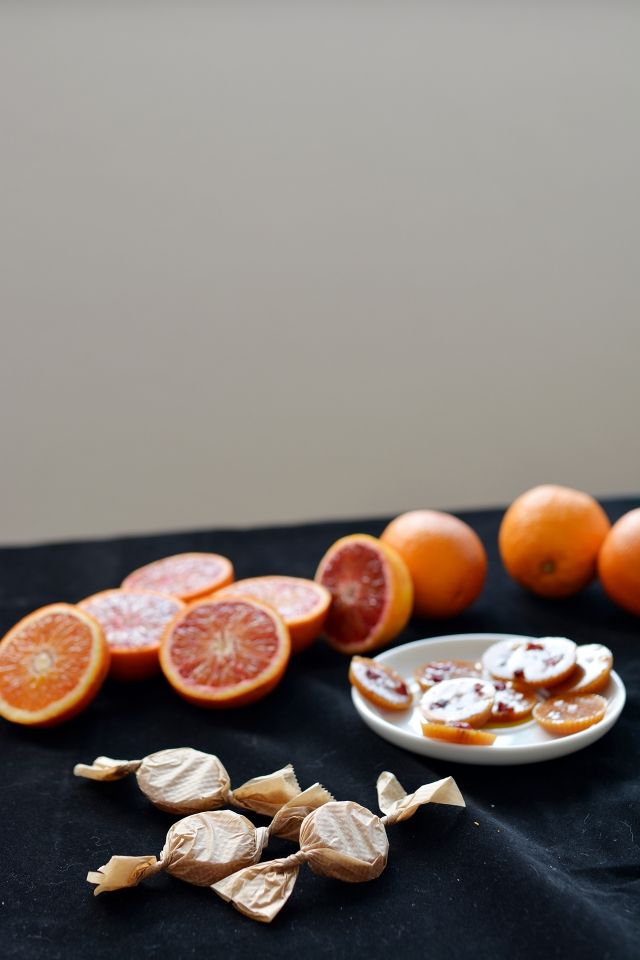
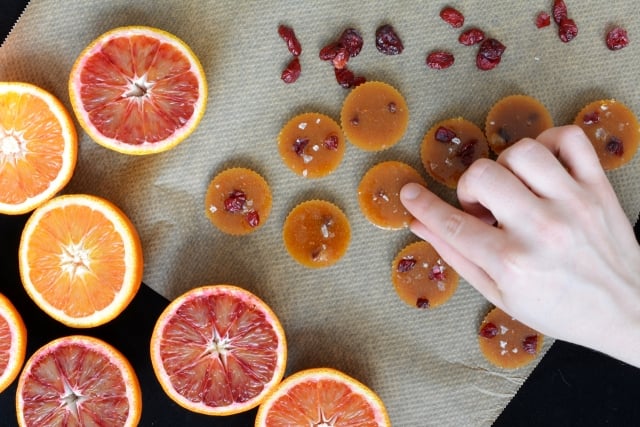
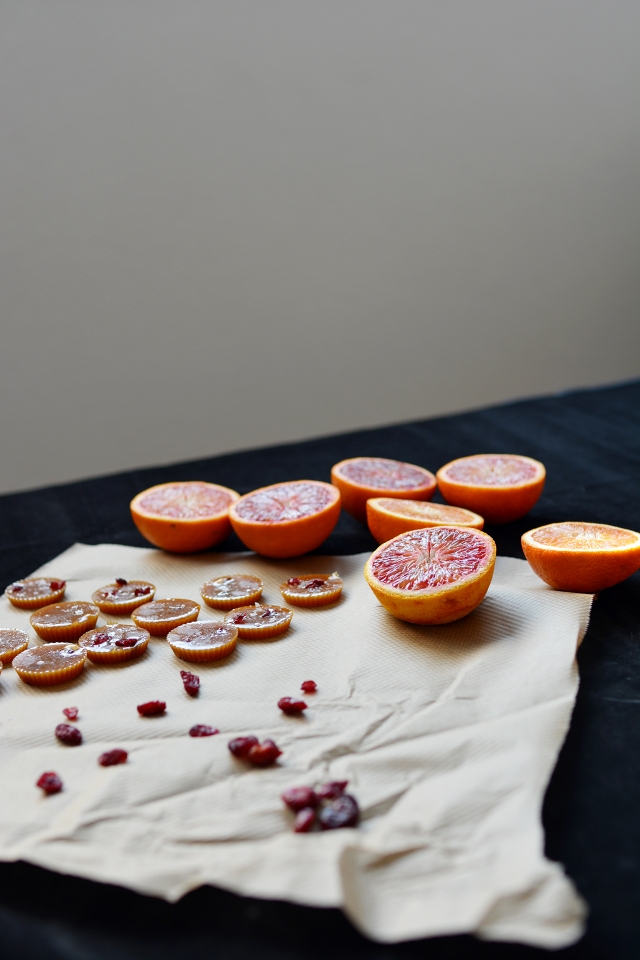
Once sprinkled with a few flakes of sea salt and some dried cranberries, these little toffees would be the perfect gift!
Why You’ll Love This Recipe
- Easy to Prepare. These candies are easy to prepare as long as you have all of your ingredients ready to go.
- Homemade Healthy Candy. These candies have healthy ingredients compared to store-bought candies.
How to Make Salted Blood Orange Toffees
These tasty homemade toffees are easy to make and make great gifts too!
Key Ingredients
- White Sugar. This sugar works perfectly to make toffee.
- Butter. Unsalted butter for that perfect buttery toffee flavor.
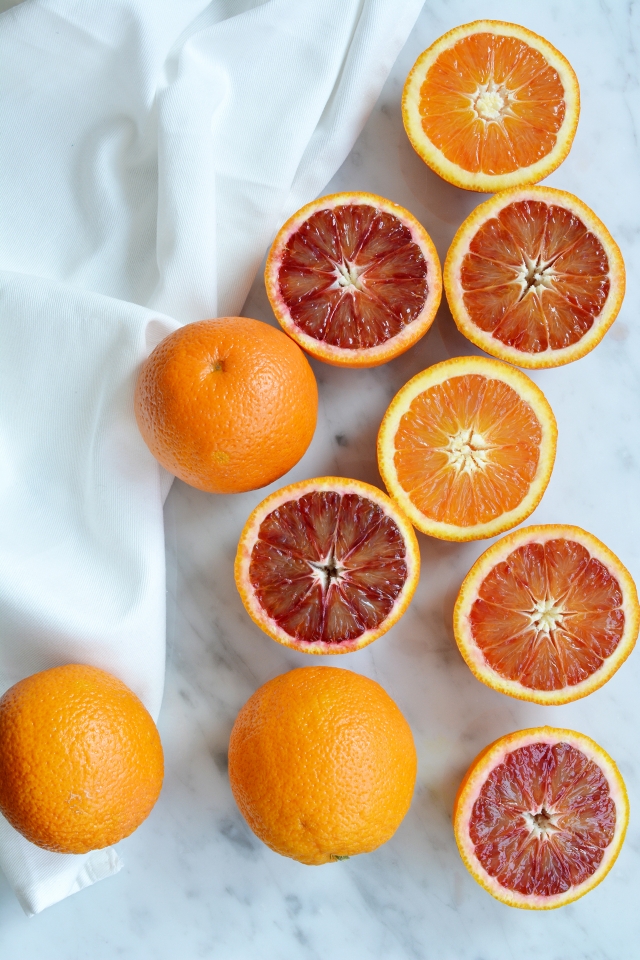
- Blood Orange Juice & Zest. Fresh juice is preferred and gives this toffee its signature flavor.
- Sea Salt. Salt enhances all of the flavors in these candies.
- Dried Cranberries. The tart cranberries compliment the buttery citrusy toffee.
Step-by-Step Instructions
1. Bring the Ingredients to a Boil. In a saucepan or skillet, add the sugar, water, and blood orange juice. Place on medium-high heat and stir until the sugar is completely dissolved.
2. Wait for the Color to Change. Keep the sugar mixture boiling until you have a medium amber-colored mixture. Take the pan off the heat and immediately add the melted butter, orange zest, and salt.
3. Pour the Toffee into Molds. Pour the toffee into molds.
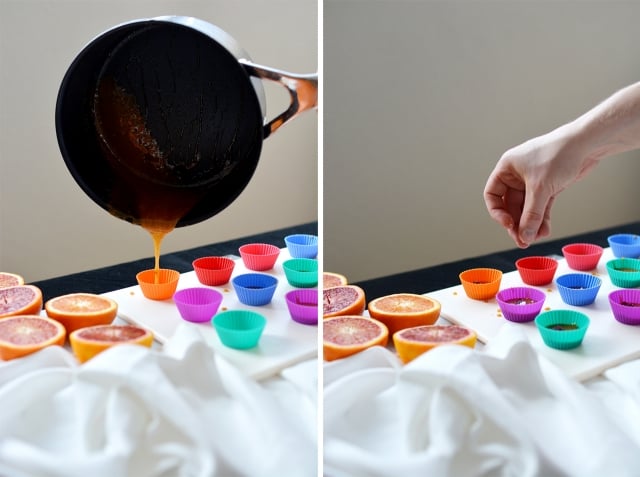
4. Garnish the Toffees. Sprinkle the toppings on top of the toffees and leave to set. Pop the hard toffees out of the mold once they are fully cold.
Recipe Tips, Variations, and Substitutions
- Have everything measured and ready to go. You do not want to be measuring things out while you need to be watching sugar boil.
- Do not stir while the sugar is boiling. No stirring once the sugar has dissolved. You want the sugar/water mixture to be bubbling quite vigorously. The sugar needs to get hot to brown properly.
- Candy Molds. Mini silicone cupcake molds are perfect for making these individual sweets, but you could use any kind of mold you like, or even pour the toffee onto a sheet of parchment paper and then break it up like bark once it has set. If you use a non-stick metal mold make sure to coat it with a little oil.
Storage Recommendations
Wrap the toffees in wax or parchment paper and store in an airtight container. Homemade toffees can be stored for up to 2 months in a cool and dry place.
Try These Other Homemade Candy Recipes
- Candied Pumpkin Seeds – Buttery, maple-flavored salted pumpkin seeds. A quick, easy, and tasty snack.
- Candied Orange Peel – A simple candy recipe that’s perfect for nibbling on or giving as a gift.
- Dairy-Free Chocolate Bark – This chocolate bark is dairy-free and vegan and you can customize it with any of your favorite toppings.
- Homemade Crystallized Ginger – These candies are great for snacking on or adding to recipes.

Salted Blood Orange Toffees
Equipment
- 1 saucepan
Ingredients
- 1/2 cup white sugar
- 50 ml water
- 2 tbsp. butter melted
- 2 tsp. blood orange fresh juice
- 1 blood orange zest
- ¼ tsp. sea salt
For Toppings
- sea salt flaked
- cranberries dried
Instructions
- In a saucepan or skillet, add the sugar, water, and blood orange juice. Place on medium-high heat and stir until the sugar is completely dissolved. After this, do not continue stirring, but have a whisk nearby for when you add the butter later.
- Keep the sugar mixture boiling until you have a medium amber-colored mixture. Swirl the pan throughout the cooking process to keep things evenly distributed. As soon as you have reached medium brown color, take the pan off the heat and immediately add the melted butter, orange zest, and 1/4 tsp of salt.
- Pour the toffee mixture straight into whatever mold you are using. If the mold is silicone, there is no need to line it with anything, but if it is a non-stick metal tray coat it with cooking spray before you start.
- Sprinkle the toppings on top of the toffees and leave to set for 30 minutes.
- Pop the hard toffees out of the mold once they are fully cold.


How much butter do we add?
Sorry I just realised I didn’t add it!! 30g and I updated the recipe too thanks for letting me know!
Wow! Orange toffee? Sounds amazing! Very cool idea. Love that you added zest and dried cranberries in them. Would make awesome gifts!
Thanks Lokness! They are super fun and really tasty. I am really enjoying blood orange season so definitely making the most of it!